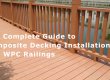
A long-lasting WPC deck depends not only on material quality, but also on correct installation details. Proper WPC decking installation is the key to building a stable, beautiful, and long-lasting outdoor deck. Many decking problems, such as warping, loose boards, water pooling, cracking, and uneven gaps, are not caused by the WPC material itself, but by incorrect installation details. This guide explains the essential WPC decking installation steps, including drainage slope, joist spacing, expansion gaps, hidden clips, edge finishing, and post-installation maintenance.
Good Materials + Good Craftsmanship = True “Long-Term Value”
Secret 1: Proper Drainage Slope in WPC Decking Installation
•Why? Standing water is one of the most common causes of deck discoloration, mold growth, and accelerated aging. During joist installation, create a drainage slope of approximately 1%–2%, or 1–2 cm per meter, toward the drainage direction.
•How?
How to Set the Slope
✓ Identify the highest and lowest drainage points before installing joists.
✓ Use a string line or laser level to guide the slope.
✓ Keep the slope consistent across the full deck area.
How to Verify Drainage
✓ Perform a water test after installation.
✓ Check whether water flows smoothly away from the deck.
✓ Correct any low spots before finishing the edges.
Secret 2: Scientific Joist Spacing Requirements for Composite Decks
•Why? The joists are the “framework” of the decking. If the spacing is too wide, the deck will sag, make noise, and warp.
•How?
o General Specifications: The center to center spacing of joists for most WPC decking should be ≤ 30cm (300mm).
o Advanced Options:
Decking thickness ≥ 25mm and high density:
The spacing can be widened to 35cm (confirm load-bearing capacity with the manufacturer).
Decking thickness < 20mm or special areas like balconies:
Strongly recommend reducing to 25cm.
Cantilevered Sections (e.g., deck edges):
Further reduce joist spacing or add additional support.


 Material Recommendation: Aluminum or stainless-steel joists are preferred for outdoor projects because they offer better corrosion resistance and long-term dimensional stability.
Secret 3: Standardizing End-Joint Installation for Maximum Stability
•Why? Improper end-joint handling during WPC decking installation can lead to shrinkage, detachment, and other issues.
•How?
o Independent Support: Ensure each decking board end is independently supported by a joist. Never allow two board ends to share a single joist.
o Double Joist Structure: Use a double-joist structure at end joints and secure with separate clips.
o Avoid Stress Concentration: All fasteners should be installed on independent joists to avoid stress concentration.

Best Practice: Each board end should have its own support and fastening position. This helps reduce stress concentration and improves long-term joint stability.
Secret 4: Leave Proper Expansion Gaps During WPC Decking Installation
•Why? WPC expands and contracts with temperature changes! Insufficient gaps during WPC decking installation can cause buckling, deformation, and even cracking or edge bursting when the decking expands.
•How?
| Gap Position | Recommended Gap |
|---|---|
| Around walls or fixed objects | 8–12 mm |
| Between board ends | 3–5 mm |
| Between board sides | 5–8 mm, depending on the clip system |
| Between large-area sections | 5–8 mm or adjusted according to climate conditions |

Pro Tip: Unpack WPC decking boards and allow them to acclimate to the installation environment for about 48 hours before installation.
Secret 5: Benefits of Segmented Installation in Large Decking Areas
•Why? WPC is affected by temperature and humidity changes, causing thermal expansion and contraction. Large continuous installations can lead to stress buildup, causing overall warping, corner lifting, uneven expansion gaps, or local deformation. Proper WPC decking installation use segmented installation to divide large areas into smaller sections, releasing stress and enhancing stability and durability.
•How?
o Divide the Installation Area: Limit each section to ≤ 6 meters (adjust based on local climate and temperature variations; shorter segments for greater differences).
o Use Breaker Boards as Dividers: Split large areas into smaller independent sections.
o Set Expansion Gaps: Leave 5-8mm expansion gaps between sections (on both sides of the breaker board). Increase gap width if installing in extreme temperatures (e.g., midsummer or midwinter).
o Reinforce Structural Support: Add extra transverse support under breaker boards to ensure stability. Ensure each section’s ends are firmly supported by joists.
o Optimize Drainage: Each segmented area should have its own drainage slope to prevent water accumulation at expansion gaps.


For more details, read our guide to breaker boards for composite deck installation.
Secret 6: Use Hidden Clips for Professional WPC Decking Installation
•Why? WPC decking clips or screws ensure stability and facilitate easy replacement.
•How?
Hidden Clip System
✓ Creates a nail-free deck surface.
✓ Helps maintain consistent side gaps.
✓ Supports easier single-board replacement.
✓ Suitable for grooved WPC decking profiles.
Face-Fixing with Screws
✓ Use stainless-steel countersunk self-drilling screws.
✓ Pre-drill holes to reduce cracking risk.
✓ Use mainly for edge boards, stairs, or special structural areas.
✓ Avoid over-tightening screws into WPC boards.
Learn more about the difference between face screws and hidden fasteners for composite decking.
Secret 7: Professional Edge Detailing for Aesthetics and Safety
•Why? Edges are the most vulnerable parts of and WPC decking installation. Poor finishing affects aesthetics and can lead to lifting, cracking, dirt accumulation, and tripping hazards. Careful edge treatment enhances installation quality, extends lifespan, and ensures long-term beauty and safety.
•How?
o Use L-shaped Edge Trim: Select L-shaped WPC or aluminum edge trim, securely fixed with screws at approximately 500mm intervals.
o Use Straight Board Edge Cover: Fixed the straight board edge cover with screws from the side at approximately 500mm intervals.
o Cut Same Decking for Edge Cover: Vertically cut the same decking material to form an L-shaped edge and then fix it.
o Stair Edges: Use specially designed WPC staircase boards.

Secret 8: Essential Post-Installation Maintenance Tips for Longevity
•Why? Correct installation is only the first step. Simple maintenance after installation helps keep WPC decking clean, safe, and stable for long-term outdoor use.
•How?
Cleaning
✓ Sweep away dust, leaves, and debris regularly.
✓ Clean stains with neutral cleaner and a soft brush.
✓ Avoid strong acidic or alkaline cleaners.
✓ Do not use steel wool or sharp cleaning tools.
Inspection
✓ Sweep away dust, leaves, and debris regularly.
✓ Clean stains with neutral cleaner and a soft brush.
✓ Avoid strong acidic or alkaline cleaners.
✓ Do not use steel wool or sharp cleaning tools.
For a full care plan, read our composite decking maintenance guide.
Need WPC Decking Installation Advice for Your Project?
Send us your deck size, installation base, climate conditions, and project requirements. Our team can recommend the right WPC decking profile, joist spacing, clip system, expansion gap plan, and installation accessories for your project.
Common WPC Decking Installation Mistakes to Avoid
Many WPC decking problems are related to small installation mistakes. Avoid the following issues to improve long-term stability and appearance.
Installing WPC decking directly on soil, grass, or unstable ground.
Ignoring drainage slope and allowing water to collect under the deck.
Using joist spacing that is too wide for the board profile.
Failing to leave proper expansion gaps near walls and board ends.
Allowing two board ends to share one joist without independent support.
Using ordinary screws that are not suitable for outdoor WPC decking.
Over-tightening fasteners and restricting natural board movement.
Sealing deck edges completely and blocking airflow.
Frequently Asked Questions About WPC Decking Installation
Can I install WPC decking directly on soil or grass?
No, it is not recommended to install WPC decking directly on soil. A solid, level, and well-drained foundation—such as a concrete slab or a crushed stone base—is essential. Direct contact with soil prevents proper drainage and airflow, which can lead to moisture buildup, instability of the joists, and potential warping of the deck boards over time.
What joist spacing is recommended for WPC decking?
For most WPC decking boards, joist spacing should be kept at 300 mm center to center or less. Thicker or high-density boards may allow wider spacing, but the final specification should always be confirmed according to the board profile and project load.
How much expansion gap should I leave for WPC decking?
As a general guide, leave 8–12 mm around walls or fixed objects, 3–5 mm between board ends, and 5–8 mm between board sides depending on the clip system. Adjust the gap according to local climate and installation temperature.
Should I use hidden clips or screws for WPC decking?
Hidden clips are preferred for most grooved WPC decking boards because they create a clean surface, control board spacing, and allow natural expansion and contraction. Stainless-steel screws may still be used for edge boards, stairs, or special structural areas.
Can WPC decking be installed over an old wood deck?
It is not recommended unless the old structure is fully inspected. Old wood may have hidden rot, poor drainage, or unstable joists. Remove damaged boards, inspect the substructure, and confirm that joist spacing meets WPC decking requirements before installation.
Do I need special professional tools to install WPC decking?
No special heavy machinery is required. You can install WPC decking using standard woodworking tools, such as a miter saw (with a fine-tooth carbide-tipped blade), a power drill, a tape measure, and a level. For a professional, seamless finish, we highly recommend using a hidden fastener system, which automatically manages the spacing between boards and leaves no visible screw heads.
How do I make WPC deck edges look professional?
Use L-shaped edge trim, fascia boards, straight board covers, or dedicated stair boards. Make sure edge details are firmly fixed while still allowing ventilation and expansion gaps.
Recommended WPC Decking Products and Related Guides
Choose the right WPC decking profile and installation accessories before starting your project. The following pages may help you compare options and plan a more durable deck system.